It was Bible Character night at Awanas the other night so I whipped up a couple of costumes for the kids, coincidentally they each wore one of my baby slings. I'll do a separate post on their fun costumes another time. Tonight what I wanted to share was how I used some sites I found on Pinterest for inspiration when I made a crown for King Sam and a crown for Queen Julia.

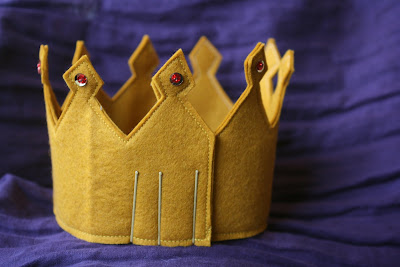
The inspiration for Sam's crown came from here. The genius in this tutorial is when you DON'T cut out two pieces of felt but instead cut out one, stitch it to the other full piece before you cut. No more matching and pinning like crazy to line things up. Saved a TON of headaches! Instead of making this a one size only crown I used bobby pins to close the back.
We live almost an hour from the nearest craft store so while Pinterest provides a ton of inspiration, we often have to improvise because I'm not running to the store to pick up one or two things every few days. You know what though? That's one of the best things about Pinterest...I find uses for things I already own and don't spend a penny. In fact, I SAVE pennies. Lots of them! Like when I made a huge batch of wipes to replace paper towels in our home. A subject for a different post... Back to the crowns.
This time Julia's:
 The inspiration for her girly version came from here. Like I said, I can't run out and get supplies every time the kids ask me to make something for them. (Someone please tell me that they are going to remember that I spent so much time creating things for them to play with. please?) Anyway, I didn't have any pretty cording so I went with the old standby, sequins. This time I figured out how to sew them on without the bead in the center and I really like how it turned out, minus the uneven line of course.
 This is what I was talking about earlier in the King's crown - you only cut out the top layer of the crown. Add the embellishments, pin the two layers together, and then stitch it all together. Once you've done that, you can easily cut the back layer out. I don't have big pieces of felt so I had to use white for the back of the crown. Not my first choice, but free is free!
 My favorite part of Julia's crown are the flowers. I made them up as I went along. No two are alike. It was fun to see how much depth I could create with a few scraps of felt, some thread, and a needle!
The best part was playing castle when we were all done. Julia didn't know what to do when both Mommy and Daddy were doting on her majesty and Sam was a really good sport about letting Julia crown him King. All the sword fighting we did so he could earn the title of King might have had something to do with it.
 Not to be left out, I made a little crown for Miss Elsa as well.
 Instead of elastic, I sewed a long ribbon on the bottom and for Julia's I used bias tape. This way they'll be able to play in kingdoms far far away for as many years as they want.


The inspiration for Sam's crown came from here. The genius in this tutorial is when you DON'T cut out two pieces of felt but instead cut out one, stitch it to the other full piece before you cut. No more matching and pinning like crazy to line things up. Saved a TON of headaches! Instead of making this a one size only crown I used bobby pins to close the back.

We live almost an hour from the nearest craft store so while Pinterest provides a ton of inspiration, we often have to improvise because I'm not running to the store to pick up one or two things every few days. You know what though? That's one of the best things about Pinterest...I find uses for things I already own and don't spend a penny. In fact, I SAVE pennies. Lots of them! Like when I made a huge batch of wipes to replace paper towels in our home. A subject for a different post... Back to the crowns.
This time Julia's:

 This is what I was talking about earlier in the King's crown - you only cut out the top layer of the crown. Add the embellishments, pin the two layers together, and then stitch it all together. Once you've done that, you can easily cut the back layer out. I don't have big pieces of felt so I had to use white for the back of the crown. Not my first choice, but free is free!
The best part was playing castle when we were all done. Julia didn't know what to do when both Mommy and Daddy were doting on her majesty and Sam was a really good sport about letting Julia crown him King. All the sword fighting we did so he could earn the title of King might have had something to do with it.


Impressive!
ReplyDelete